tech
3d printer fume extractor

3D printers function by melting plastic filaments at a temperature range of 190 to 260 degrees Celsius and then depositing the melted layers to craft our imaginations into reality. This heating of the plastic (PLA, ABS, PETG, TPU, Nylon) filaments releases volatile compounds into the air, which could overtime prove to be toxic to human health.
I've recently upgraded to a semi-industry grade 3D printer, which allows for higher hot end temperatures, better temperature regulation and therefore the ability to experiment with materials other than the standard PLA. However, materials such as ABS tend to release toxic fumes, which would prove harmful to my family's health. Hence the need to design a solution to channel the toxic fumes from the printer to the outside air.
Introducing, the DIY fume Extractor.
step 1:
the top enclosure

The first step would be to ensure that the printer is fully enclosed, hence the top acrylic cover.
Acrylic sheets could be bought at extremely low prices. I bought these custom sized acrylic sheets off shopee at under 10 sgd. All I had to do was combine 4 acrylic sheets with a top layer together using solvent based glues. Acrylic glue softens the acrylic surfaces when applied, chemically bonding them together.
step 2:
adding a dc fan

Next step would be to extract air from the enclosure.
I recycled an old 120mm 12V dc powered PC fan from my old pc build for this purpose.

There would also be a need to create a 120mm diameter hole on the acrylic enclosure.
I first marked out the circle's circumference and drilled holes that aligned to the fan's mounting screw holes.


Using a customizable diameter drill bit, I drilled the 120mm hole on the Acrylic board.
It wasn't a clean cut unfortunately, as I did not clamp the acrylic board and it shifted while I was drilling it, hence the small crack.
*Reminder to purchase / 3D print a Clamp-on Vise for the next project that requires drilling.
It would also have helped if I drilled the hole prior to gluing the walls together.

Fortunately the crack was easily dissolved when solvent glue was applied to it, and the fan was then mounted on the acrylic top with m4 screws and nuts.
step 3:
AIRTIGHT GASKET

Using Fusion 360, I then designed and 3D printed a gasket that would custom fit the Fan's dimensions, so as to allow channeling of the air from the fan to the exhaust pipe without any leakage.
step 3:
assembly


A 90cents ring clamp purchased off a neighborhood store was perfect for attaching the gasket to the exhaust pipe.


The final piece would be a funnel to increase the pressure of the outgoing air. Using fusion360, I designed a 120mm funnel with a 15mm by 120mm exit hole. The smaller area of the exit hole compared to the 120mm circle's area meant that air pressure would be significantly increased.
The rectangular design was also made such that I could "clamp" the funnel to the window frame with the window pane when I switch on the aircon while 3D printing. When not using the aircon, the exhaust pipe could rest on the metal railings of the window frame as well. The funnel was also attached to the exhaust pipe using a ring clamp.
step 4:
final mounting
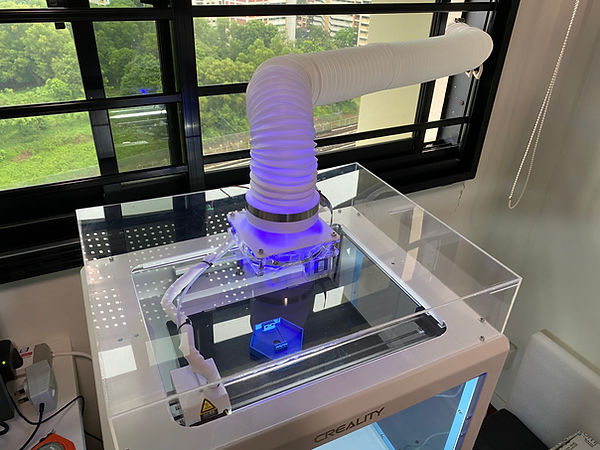
After mounting the set up on the CR5-Pro 3D printer, I used some epoxy to seal the contact points between each component to prevent leakage.
I will also be ordering carbon activated filters, which will be fitted in the funnel to filter the exiting fumes released into the open air.
Overall this was an extremely handy modification to the Creality CR5-Pro, as it is impossible to purchase modifications / read articles on it anywhere due to its rarity. Hopefully a fellow CR5-Pro user would find this guide useful.